Part 1 covered the architectural decisions. This post covers the actual implementation of using OpenTofu to provision VMs and Ansible to configure them.
The Toolchain#
I’m using OpenTofu for infrastructure provisioning (VMs, disks, networking) and Ansible for configuration management (packages, services, Docker containers).
OpenTofu is an open-source fork of Terraform. I lean towards open-source whenever possible, and all the basic functionality is compatible with Terraform anyways.
Cloud-Init Templates#
I created a cloud-init template from Ubuntu’s official cloud image. This is a one-time manual process on Proxmox:
wget https://cloud-images.ubuntu.com/noble/current/noble-server-cloudimg-amd64.img
qm create 9000 --name ubuntu-2404-cloudimg --memory 2048 --net0 virtio,bridge=vmbr0
qm importdisk 9000 noble-server-cloudimg-amd64.img local-lvm
qm set 9000 --scsihw virtio-scsi-pci --scsi0 local-lvm:vm-9000-disk-0
qm set 9000 --boot c --bootdisk scsi0
qm set 9000 --ide2 local-lvm:cloudinit
qm set 9000 --serial0 socket --vga serial0
qm set 9000 --agent enabled=1
qm template 9000
Cloud-init handles SSH key injection, network configuration, and initial setup.
OpenTofu Configuration#
Directory Structure#
terraform/proxmox/
├── main.tf                 # Provider config, backend
├── variables.tf            # Input variables
├── vms.tf                  # VM resource definitions
├── terraform.tfstate       # State file (backed up to B2)
└── .terraform/             # Provider plugins
Proxmox Terraform Provider#
I’m using version 3.0.2-rc06 of the Telmate provider for Proxmox.
main.tf:
terraform {
  required_version = ">= 1.6.0"

  required_providers {
    proxmox = {
      source  = "telmate/proxmox"
      version = "3.0.2-rc06"
    }
  }

  # Local state for now - will migrate to S3-compatible backend later
  backend "local" {
    path = "terraform.tfstate"
  }
}

provider "proxmox" {
  # Configuration via environment variables
}
I had to make sure to use documentation and references which were up to date, as version 3.0 of the provider made some syntax changes, specifically for CPU and disks.
I also learned that if you don’t define scsi0 in the resource, it becomes “unused” and the VM won’t boot. The error message doesn’t make this obvious.
Here’s an example VM resource:
resource "proxmox_vm_qemu" "nextcloud" {
  name        = "nextcloud"
  target_node = var.proxmox_node
  clone       = var.template_name
  full_clone  = false

  startup_shutdown {
    order         = 4
    startup_delay = 5
  }

  cpu {
    cores   = 2
    sockets = 1
  }
  memory = 4096

  disks {
    scsi {
      scsi0 {
        disk {
          storage = var.proxmox_storage
          size    = 20
        }
      }
      scsi1 {
        disk {
          storage = var.proxmox_storage
          size    = 100
        }
      }
    }
    ide {
      ide2 {
        cloudinit {
          storage = var.proxmox_storage
        }
      }
    }
  }

  ipconfig0    = "ip=192.168.100.20/24,gw=${var.network_gateway}"
  nameserver   = var.dns_servers
  searchdomain = var.dns_domain
  ciuser       = var.vm_user
  sshkeys      = var.ssh_public_key

  tags = "service,production"
}
Linked clones (full_clone = false) - VMs share a base disk with only deltas stored per VM. Saves storage and makes deployments nearly instant. The downside is you can’t delete the template without breaking VMs, but that’s fine.
Dual-disk architecture
scsi0(20GB) - OS disk, not backed up, easily rebuiltscsi1(variable size) - Application data, backed up to Backblaze B2
Startup ordering - The startup_shutdown block defines boot order for recovering from power outages:
- Tailscale subnet router (remote access)
- DNS server (everything else depends on this)
- Traefik reverse proxy (routing for services)
- Application services (Nextcloud, Immich, Jellyfin)
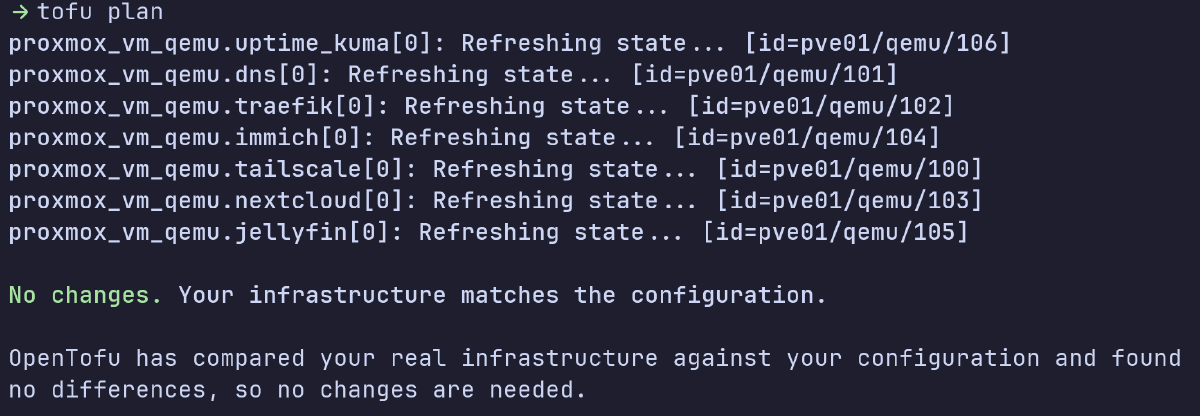
Deployment workflow:
source ~/secrets/proxmox-credentials
cd terraform/proxmox
tofu plan
tofu apply
State Management#
OpenTofu tracks infrastructure in terraform.tfstate.
I’m using local state; remote state with locking isn’t necessary for my usecase, in a single-user homelab.
Secrets Management#
All sensitive values are externalized via environment variables:
# ~/secrets/proxmox-credentials
export PM_API_URL="https://192.168.1.10:8006/api2/json"
export PM_TLS_INSECURE=1
export PM_API_TOKEN_ID="terraform-prov@pve!terraform"
export PM_API_TOKEN_SECRET="..."
export TF_VAR_ssh_public_key="$(cat ~/secrets/ssh/lab_ssh_key.pub)"
export TF_VAR_dns_domain="..."
Ansible Configuration#
After tofu apply creates the VMs, Ansible configures them.
Directory Structure#
ansible/
├── ansible.cfg                    # SSH keys, vault password, defaults
├── inventory/
│   ├── production                 # Hostnames mapped to IPs
│   └── group_vars/
│       └── all/
│           ├── all.yml            # Non-sensitive variables
│           └── vault.yml          # Encrypted secrets
├── playbooks/
│   ├── bootstrap.yml                        # OS hardening, packages, firewall
│   ├── setup-data-disks.yml                 # Mount scsi1 at /data
│   ├── deploy-tailscale-subnet-router.yml   # Remote access via Tailscale
│   ├── deploy-dns.yml                       # BIND9 with DNS over TLS
│   ├── deploy-traefik.yml                   # Reverse proxy + Let's Encrypt
│   ├── deploy-nextcloud.yml                 # File sync
│   ├── deploy-immich.yml                    # Photo management
│   ├── deploy-jellyfin.yml                  # Media server
│   └── setup-backup-agent.yml               # Restic backups to B2
├── tasks/
│   └── ensure-docker.yml          # Reusable Docker install
└── templates/
    ├── resolv.conf.j2
    └── 50unattended-upgrades.j2
Configuration Files#
ansible.cfg sets defaults so I don’t need to specify them on every run:
[defaults]
inventory = inventory/production
host_key_checking = False
remote_user = ubuntu
private_key_file = ~/secrets/ssh/lab_ssh_key
vault_password_file = ~/secrets/ansible-vault-pass
stdout_callback = yaml

[ssh_connection]
pipelining = True
The inventory maps hostnames to IPs:
[core_services]
nextcloud ansible_host=192.168.100.20
immich ansible_host=192.168.100.21
jellyfin ansible_host=192.168.100.22

[infrastructure]
tailscale ansible_host=192.168.100.100
dns ansible_host=192.168.100.53
traefik ansible_host=192.168.100.80

[all:vars]
ansible_user=ubuntu
ansible_python_interpreter=/usr/bin/python3
Ansible Packaging#
Debian’s repository version of Ansible was outdated and caused errors with some modules. I ended up using pip in a venv instead:
python3 -m venv ~/ansible-venv
source ~/ansible-venv/bin/activate
pip install ansible
Secrets Management#
Sensitive values go in an encrypted Ansible Vault file:
group_vars/all/vault.yml:
vault_dns_domain: "..."
vault_cloudflare_api_token: "..."
vault_b2_application_key: "..."
...
Because vault_password_file is configured in ansible.cfg, playbooks automatically decrypt vault.yml, which is committed to Git encrypted.
ansible-playbook playbooks/deploy-dns.yml # no password prompt
Bootstrap Playbook#
I run the bootstrap playbook on all new VMs after creation.
Key tasks:
- Update all packages
- Configure unattended-upgrades
- Harden SSH (disable password auth, disable root login)
- Configure UFW firewall
- Reboot if kernel updates installed
Remote Access: Tailscale Subnet Router#
The Tailscale subnet router is a dedicated VM that exposes the entire 192.168.100.0/24 network to my Tailscale tailnet, giving me secure remote access to all services.
A dedicated VM keeps Tailscale out of the hypervisor (reducing attack surface) and makes it easy to rebuild.
The setup is straightforward:
- OpenTofu creates a VM at 192.168.100.100
- Ansible installs Tailscale and enables IP forwarding
- Tailscale advertises the 192.168.100.0/24 route
- Approve the route in Tailscale admin console
Service Deployment Pattern#
Services run as Docker containers whenever possible. The pattern:
- Include
ensure-docker.ymltask to install Docker if needed - Create directories and deploy configs
- Run the Docker container with restart policies
Example:
- name: Deploy bind9 DNS
  hosts: dns
  become: true
  tasks:
    - name: Ensure Docker is installed
      include_tasks: ../tasks/ensure-docker.yml

    - name: Create bind9 directories
      file:
        path: "/opt/bind9/{{ item }}"
        state: directory
      loop: [config, zones, cache]

    - name: Deploy bind9 config
      template:
        src: named.conf.j2
        dest: /opt/bind9/config/named.conf
      notify: restart bind9

    - name: Run bind9 container
      docker_container:
        name: bind9
        image: ubuntu/bind9:latest
        network_mode: host
        restart_policy: unless-stopped
        volumes:
          - /opt/bind9/config:/etc/bind:ro
          - /opt/bind9/cache:/var/cache/bind
Putting it Together#
Complete deployment from scratch:
# 1. Provision VMs
cd terraform/proxmox
source ~/secrets/proxmox-credentials
tofu apply

# 2. Wait for cloud-init to complete
sleep 60

# 3. Bootstrap OS
cd ../../ansible
ansible-playbook playbooks/bootstrap.yml

# 4. Deploy services
ansible-playbook playbooks/deploy-dns.yml
ansible-playbook playbooks/deploy-traefik.yml
ansible-playbook playbooks/deploy-nextcloud.yml
Every VM, service, and config is in Git. If my hardware dies, I can rebuild from scratch with just a few commands.
Next#
DNS with BIND9 and TLS certificates via Traefik